


Hello everyone!
This is a generic guide written for the DPS League designed to help people understand the positioning and skill activation sequence for a standard left to right ISA.
Positioning and skill sequence is probably one of the more complex requirements that can greatly influence the DPS outcome. The other major factor would be team composition.
Starting position from an organised run has a countdown started by the host, public runs just start the moment you get in. A 1 second full impulse burst is required to get you into range to shoot the first central group.
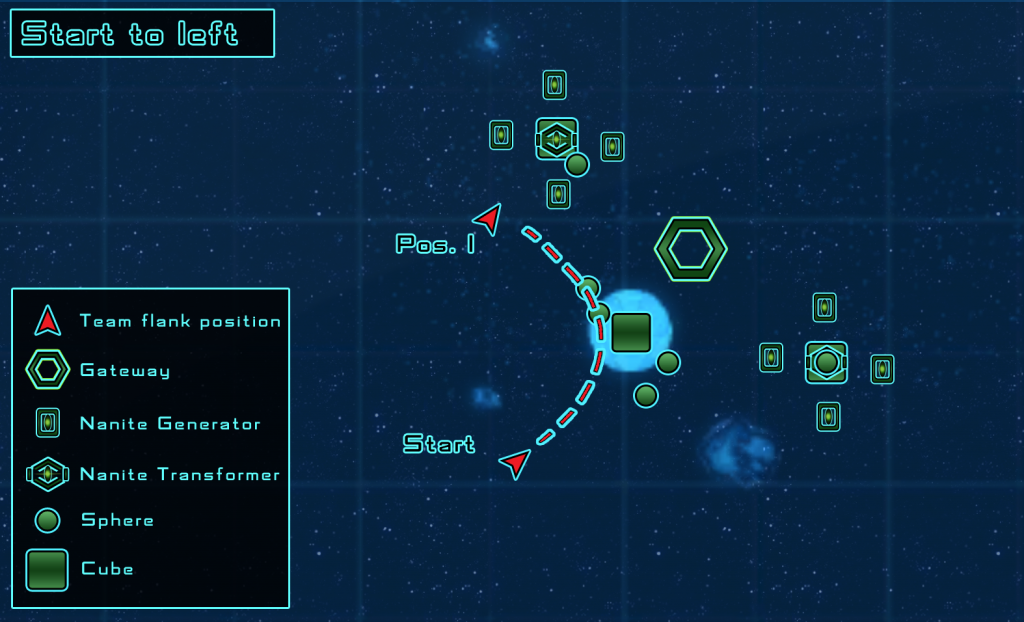 (graphic by @reptilecynrik)
Starting Group:
- A Normal Attack consists of Activating Emergency Power to Weapons, Kemocite, Attack Pattern Beta, Scatter Voller or Fire at Will, then shoot
- optional to use Tac Team to clear b...
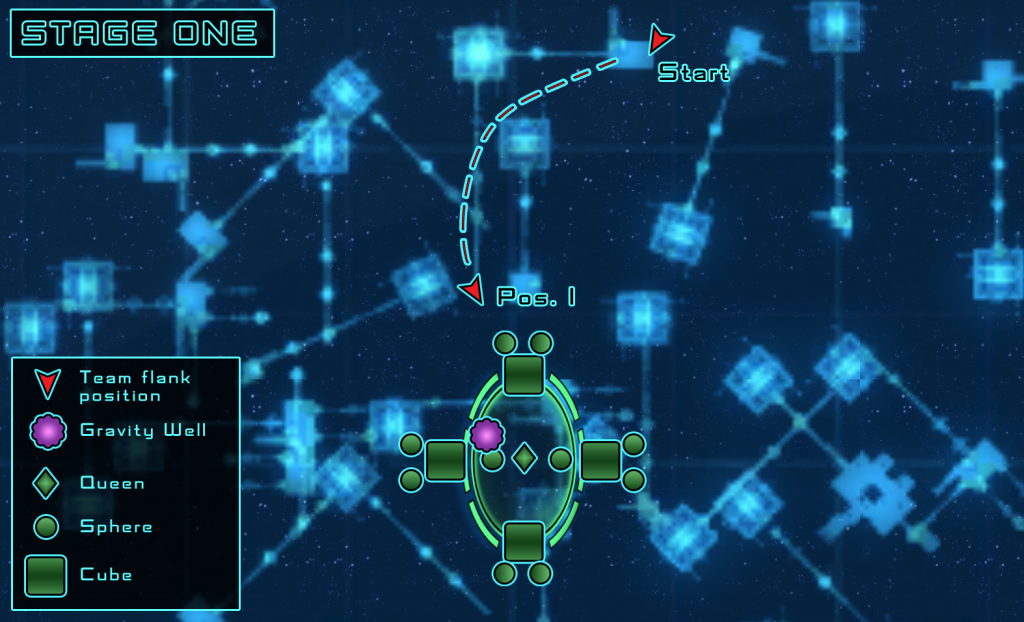 (graphic by @reptilecynrik)
Recent Comments